Table of Contents
1. Introduction
2. Why Connect Your Email Sending Domain in HubSpot?
3. Step 1: Accessing the Settings in HubSpot
4. Step 2: Navigating to the Domains and URLs Section
5. Step 3: Connecting Your Email Sending Domain
6. Step 4: Verifying the Email Sending Domain
7. DNS Verification: Authorize Tab or Manual Addition
8. Step 5: Signing in to Your DNS Provider
9. Step 6: Verifying Your DNS Records
10. Conclusion
How to Connect Your Email Sending Domain in HubSpot
In today's tutorial, we will learn how to connect your email sending domain in HubSpot. If you want to send marketing emails from your own domain, such as info@yourdomain.com, connecting your email sending domain to HubSpot is essential. This allows HubSpot to send emails on your behalf, ensuring a professional and personalized email experience for your recipients.
1. Introduction
Connecting your email sending domain in HubSpot is a crucial step in establishing your brand identity and improving email deliverability. By following the steps outlined in this tutorial, you'll be able to seamlessly integrate your domain with HubSpot and start sending emails with confidence.
2. Why Connect Your Email Sending Domain in HubSpot?
Before we dive into the process, let's understand why connecting your email sending domain in HubSpot is important. By using your own domain for email marketing, you can:
- Build trust and credibility: Sending emails from your own domain enhances your brand's professionalism and trustworthiness.
- Improve deliverability: Email service providers are more likely to deliver emails from verified domains, reducing the chances of your emails ending up in spam folders.
- Personalize your emails: With a custom domain, you can create personalized email addresses that align with your brand, such as info@yourdomain.com or support@yourdomain.com.
Now that we understand the benefits, let's proceed with the step-by-step process of connecting your email sending domain in HubSpot.
3. Step 1: Accessing the Settings in HubSpot
To begin, log in to your HubSpot account and navigate to the settings icon located in the main navigation bar. Click on it to access the settings menu.
4. Step 2: Navigating to the Domains and URLs Section
In the left sidebar menu, you'll find the "Website" section. Click on it to expand the options, and then select "Domains and URLs" from the dropdown menu. This will take you to the domain management page.
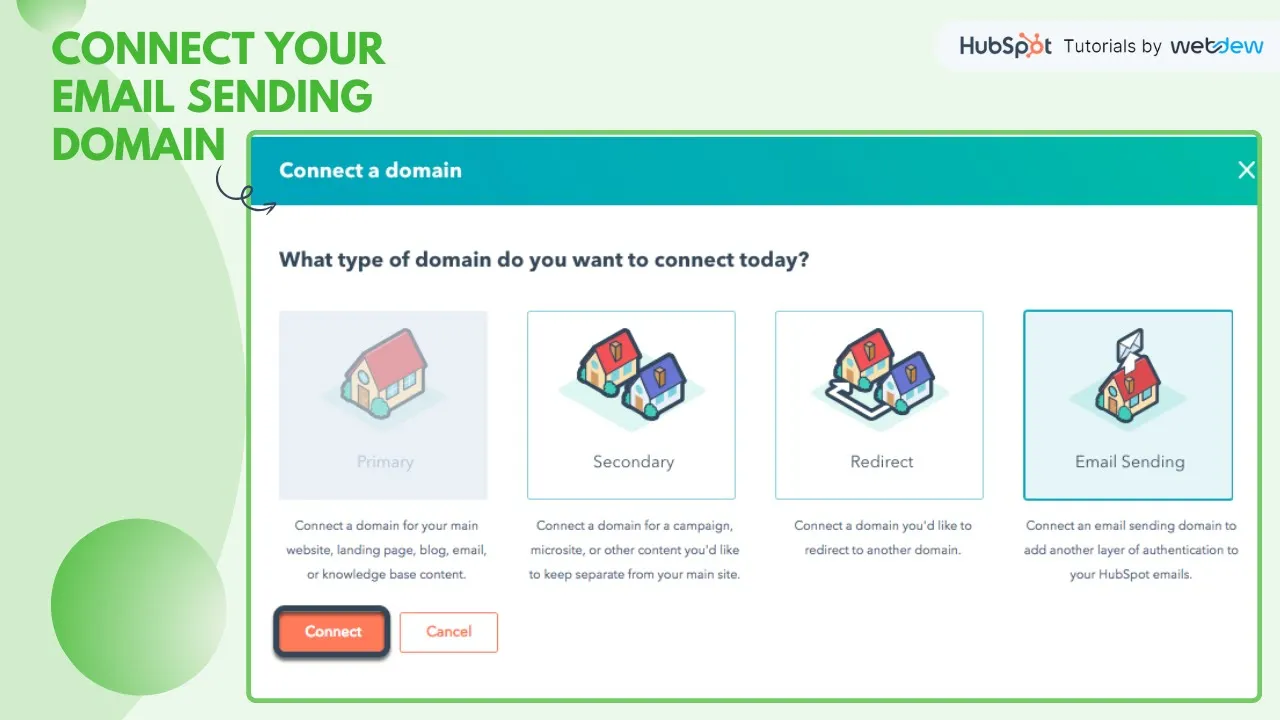
5. Step 3: Connecting Your Email Sending Domain
On the domain management page, locate the "Connect to Domain" button and click on it. A dialog box will appear, presenting you with different connection options. Choose "Email Sending" to proceed with connecting your email sending domain.
6. Step 4: Verifying the Email Sending Domain
After selecting "Email Sending," you'll be directed to the domain connection screen. Here, enter the email address you use to send marketing emails from your domain. Double-check the accuracy of the email sending domain and click "Next" to proceed.
7. DNS Verification: Authorize Tab or Manual Addition
At this stage, HubSpot will ask for DNS verification. You have two options: either click on the "Authorize" tab to automate the verification process or manually add the required DNS records. Choose the method that suits you best.
8. Step 5: Signing in to Your DNS Provider
If you choose the manual addition method, sign in to your DNS provider's website. Locate the DNS settings and add the required records as instructed by HubSpot. This step may vary depending on your DNS provider, but the general process involves adding TXT or CNAME records.
9. Step 6: Verifying Your DNS Records
Once you've added the necessary DNS records, return to HubSpot and click "Next" to verify your DNS records. HubSpot will check if the records are correctly configured. If successful, you'll receive a confirmation message, indicating that your email sending domain is now connected.
10. Conclusion
Congratulations! You have successfully connected your email sending domain in HubSpot. Now, you can send marketing emails from your own domain, enhancing your brand's identity and improving email deliverability. If you have any further questions or need assistance, feel free to leave a comment, and we'll be happy to help.
---
**Highlights:**
- Connecting your email sending domain in HubSpot enhances brand credibility and improves email deliverability.
- By using your own domain, you can personalize your email addresses and build trust with your recipients.
- The step-by-step process includes accessing the settings, navigating to the domains and URLs section, connecting your email sending domain, verifying the domain, and completing DNS verification.
- You can choose between automated DNS verification or manually adding the required DNS records.
- Once your DNS records are verified, your email sending domain will be successfully connected in HubSpot.
---
**FAQ:**
Q: Why is it important to connect my email sending domain in HubSpot?
A: Connecting your email sending domain in HubSpot enhances brand credibility, improves email deliverability, and allows for personalized email addresses.
Q: Can I automate the DNS verification process?
A: Yes, HubSpot provides an option to automate DNS verification. Simply click on the "Authorize" tab during the verification step.
Q: What if I prefer to manually add DNS records?
A: If you choose to manually add DNS records, sign in to your DNS provider's website and follow the instructions provided by HubSpot.
Q: How long does it take for the DNS records to be verified?
A: The verification process may take some time, typically ranging from a few minutes to a few hours. HubSpot will notify you once the verification is complete.
Q: Can I send marketing emails immediately after connecting my email sending domain?
A: Yes, once your email sending domain is connected and verified, you can start sending marketing emails right away.
---
Resources:
- [HubSpot Tutorials](https://www.hubspot.com/tutorials)
- [HubSpot Documentation](https://knowledge.hubspot.com/)
- [HubSpot Community](https://community.hubspot.com/)
- [AI Chatbot Product](https://www.voc.ai/product/ai-chatbot)

